
React native webview is a component that is used to load HTML content and also web page. So you can convert any website into a mobile app. In this tutorial we will discuss How you will create a mobile app step by step.

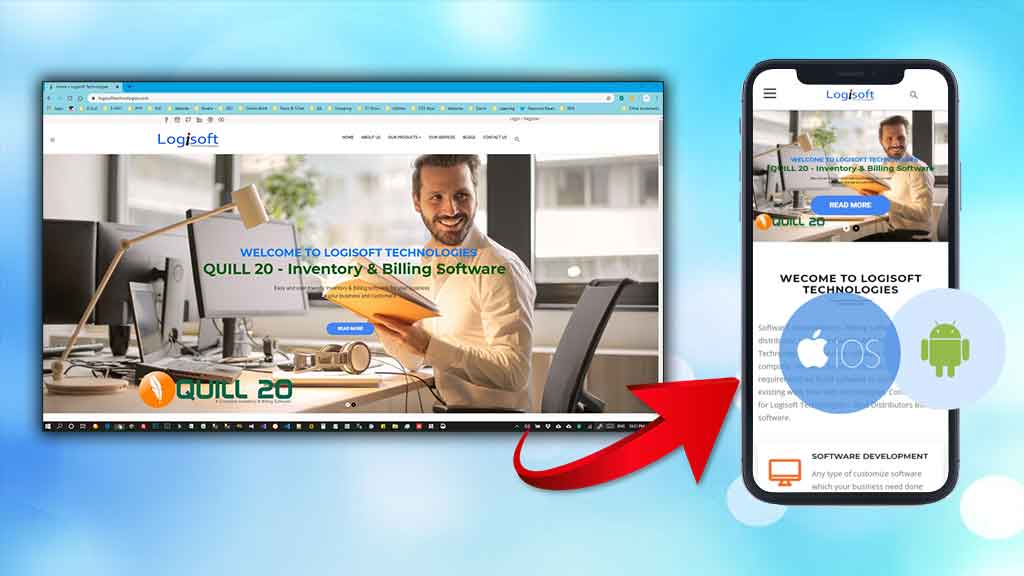
Basically webview can show websites like web browser. It also supports CSS and javascript. So if you want to convert any website into a mobile application, then you can use the webview component. The main advantage of this type of application is a maintenance-free mobile application.
Basically react native app use for developing mobile application so webview load responsive view of a website. Therefore you do not need to maintain mobile applications separately. Just you need to upgrade your website from time to time.
Now we will discuss step by step process to convert a website into a mobile application.
Step 1 : Responsive Design.
As you want to create a mobile application using a “react-native app” using a webview component, therefore, you need a responsive design for the whole website.
Step 2 : Create React Native App.
First of all you need to install and create a native application in the “react-native”. Use the following command to create a native app.
create-react-native-app native-demo

How you will create React Native App
Click on above link to know how you will create react native app 1st time in Visual Studio Code.
Step 3 : Install and import webview component.
In React native app webview is a react component. so to use it you should install “react-native-webview” in your application. To install it run following command.
npm install –save react-native-webview
Step 4 : Write code as follows
Before using webview you should import the component in your .js file. To import the component use the following code.
import {WebView} from ‘react-native-webview’;
Basic code for webview is following
Now the app is ready to work. You can test your application at the expo. Read more about Basic React Native App.
Step 5 : Handle Mobile Back Button.
In case of web view application mobile back button not functioning as per webview browsing history. Every time the app closes after pressing the back button of the mobile. So if you want to enable go back function for webview application you need to write code properly for go back function.
To enable the “goBack” function write the following code in the .js file where the webview component used. In this case “App.js” file.
Code for App.js File
Hare we added two more attributes one is “ref” and another is “onNavigationStateChange” in the webview component. Then create an arrow function “onAndroidBackPress” to handle the android back button.
After that add Event Listener under componentWillMount() function and also remove Listener under componentWillUnmount() function.
Step 6 : Build Android and iOS App for Mobile.
Now time to build an app for android and ios also. Before start, build make sure that you have properly configured the “App.json” file.
You have to set the name, description, slug, and Also configure the android and ios sections. Following is my “App.json” file.
App.json file Sample
For build app run appropriated command. If you want to build an android app then the command is below.
expo build:android
In case of ios command is below.
expo build:ios